Send a Google Forms Confirmation Email with pipiform
In this guide
Send a respondent more than an on-screen “thank you.” Form Notifications by pipiform lets you email an acknowledgement with your own subject, submitted details and next-step instructions after a Google Form response.
This tutorial is published by pipiform, the maker of Form Notifications and Forms for Google Drive.
Install Form Notifications · View features and plans
For example, a workshop enquiry can receive “We received your workshop request,” a copy of the submitted information and a realistic reply time. That gives the person something to find in their inbox later and reduces uncertainty about whether the request arrived.
Prepare a form that can address the email correctly
Add a required Email question and a Name question if you want a personal greeting. Use email-address validation on the email question where appropriate. For this example, Comments contains the workshop request.
The important connection is between the recipient setting and the answer that holds the address. Typing an address into the message body will not make that person a recipient.
1. Create your confirmation workflow
Open the form on a computer. Choose Add-ons → Form Notifications for Google Forms™ → Open App → Create → Email Notification. Name it “Workshop acknowledgement” so you can distinguish it from internal alerts.
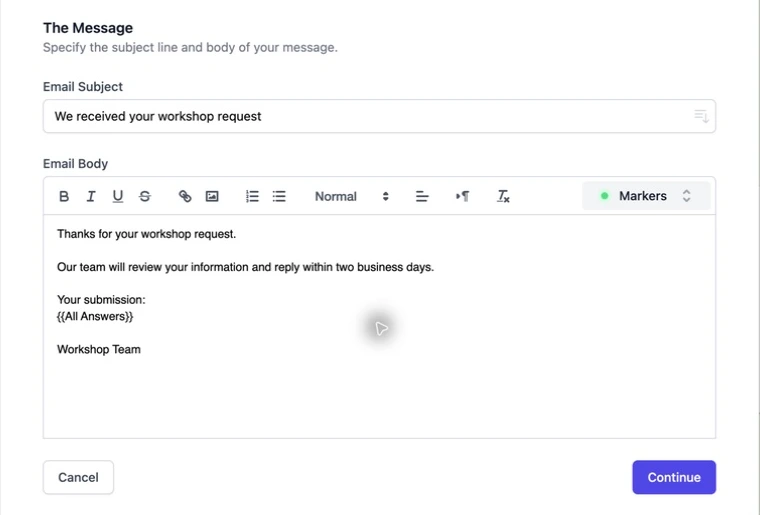
Set the subject to “We received your workshop request.” Write a short message explaining what the person has submitted and what you will do next.
| Form purpose | Useful confirmation wording |
|---|---|
| Enquiry | We received your enquiry; our team will reply |
| Registration request | We received your request; your place is awaiting confirmation |
| Feedback | Thank you; your feedback has been recorded |
| Support request | We received your report; here is what to include in a follow-up |
Do not tell someone that a booking is confirmed or payment completed just because a form was submitted. Those statements need the corresponding business process.
2. Include the details the respondent will need
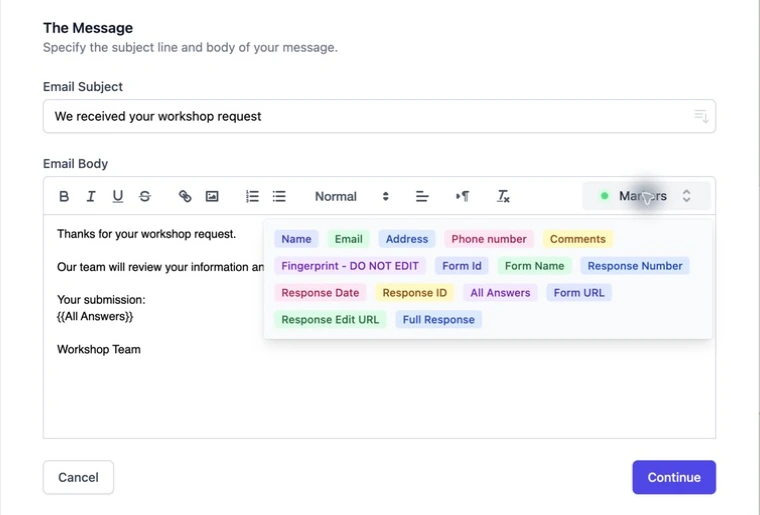
Use Markers in the editor to insert the respondent’s Name or a relevant answer. Choose All Answers if the email should contain the full response summary. For a brief receipt, selected fields are often easier to read.
Hello [insert Name],

Thanks for your workshop request.
We will review it and reply within two business days.

Your request: [insert Comments]

Workshop Team
Insert the fields through the menu rather than leaving the bracketed instructions in the email. If you include an edit-response link, use the relevant marker and make sure response editing is appropriate for your form.
3. Map the respondent’s email address
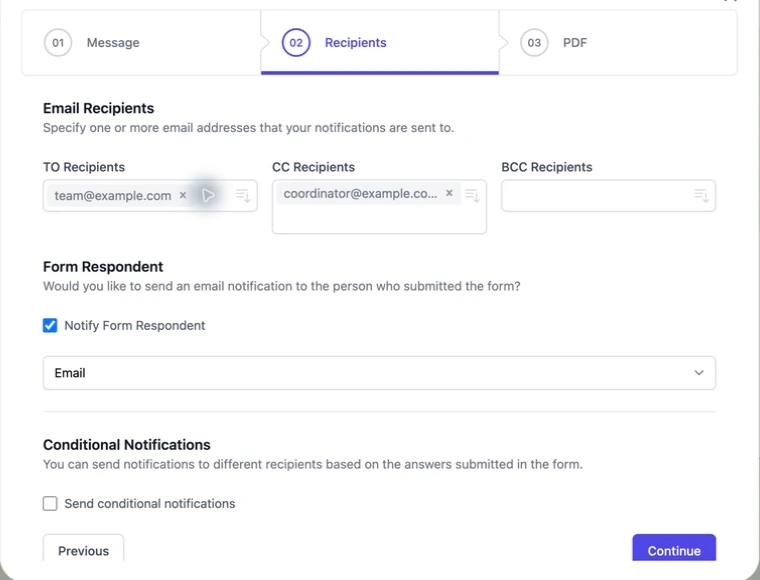
Click Continue, enable Notify Form Respondent, and select Email from the field dropdown. The selected answer supplies the address for each submission.
If an employee needs a different message, create an internal notification rather than copying the customer message to everyone.
4. Save and test the complete journey
Save the workflow. Submit a fictional response with an address you control, then open the inbox. Check that the email went to the submitted address, uses the intended subject and includes the correct answers. Reply to it without sending and inspect the destination if reply handling matters.
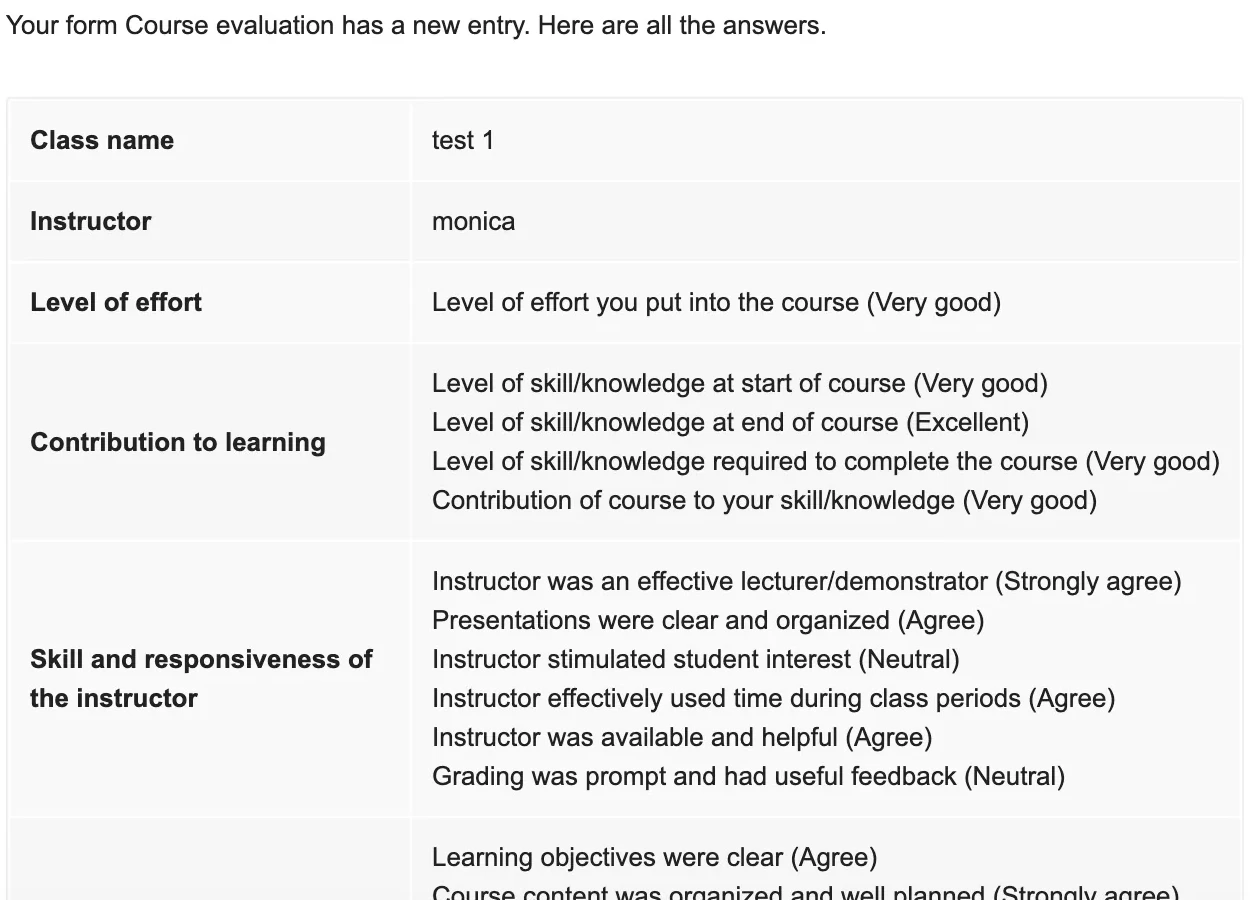
A previous pipiform tutorial test was confirmed received by the recipient, with the submitted name and workshop information present. Your own test checks your form’s field mapping and message, which can differ from ours.
Confirmation email, response receipt or on-screen message?
The on-screen confirmation message is shown immediately after submission; it is not an email. Google’s response receipt is useful for sending a copy of answers when its email collection and receipt settings are configured. pipiform is useful when the email itself needs custom wording, a branded sender display name, answer markers or additional recipient rules.
You can keep an on-screen message such as “Thanks—check your inbox for the next steps” alongside your pipiform workflow. Confirm delivery first so that the message sets the right expectation.
If the confirmation does not arrive
Check the response exists in Google Forms, that the workflow is saved, that Email is the selected recipient field and that the submitted address is correct. Then check spam and the account’s sending allowance. Follow the notification troubleshooting guide for a step-by-step diagnosis.
Can I send different confirmations for different answers?
Use a conditional notification when the recipient workflow depends on an answer. If audiences need different message bodies, configure separate workflows and test each one.
Is this a mailing-list subscription?
No. A form confirmation acknowledges that submission. Design any separate marketing subscription and consent process explicitly.
Try it with your own form
Build a short acknowledgement for one form, map the Email answer and send a test to yourself. You can add more detail after the basic journey works.
Install Form Notifications · Review the product and pricing
Form Notifications has a limited free mode of 20 emails per day. Check the current plan for recipient limits and paid options before using a large mailing workflow.
For managing forms and reviewing responses on iPhone or iPad, use the separate Forms for Google Drive app. It complements the desktop add-on workflow; an app subscription does not unlock the add-on. The app is US$59.99/year with a 3-day trial, subject to the offer in your App Store region. View the app on the App Store.