Customize Google Forms Email Notifications with pipiform
In this guide
Turn a form submission into an email that tells the recipient what happens next. With Form Notifications by pipiform, you can write your own subject and message, insert submitted answers, and use the same form to acknowledge a customer or alert your team.
This tutorial is published by pipiform, the maker of Form Notifications and Forms for Google Drive.
Install Form Notifications · View features and plans
This walkthrough builds a workshop-request acknowledgement. You will need a Google Form with Name, Email, and Comments questions, plus an inbox you can use for a test. The example is a request receipt, not a confirmed booking.
1. Open the message editor
On a computer, open your form in edit mode. Choose Add-ons → Form Notifications for Google Forms™ → Open App, then Create → Email Notification. To change an existing notification, use its Actions → Edit option.
Give the workflow an internal name such as “Workshop request acknowledgement.” Set a recognizable sender display name such as “Workshop Team.” The workflow name helps you find the rule later; it is not the email subject.
2. Write a subject and a next step
In Email Subject, enter “We received your workshop request.” In Email Body, replace the default text with a short acknowledgement, an accurate response time, and a signature. Select unwanted default content before replacing it, so the old text does not remain below your new message.
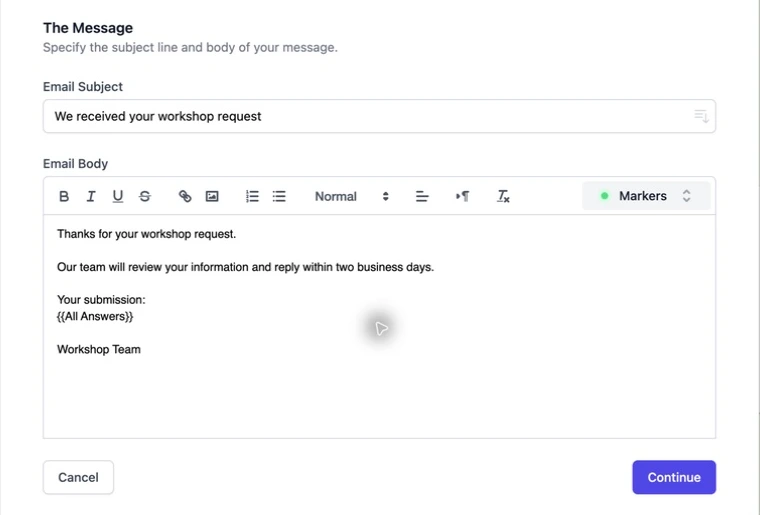
Subject: We received your workshop request

Thanks for your workshop request.

Our team will review your information and reply within two business days.

Your submission:
[Insert All Answers from the Markers menu]

Workshop Team
Only promise two business days if your team can meet that deadline. A clear next step makes the message useful even when the recipient does not need a copy of every answer.
3. Personalize the message with real answer fields
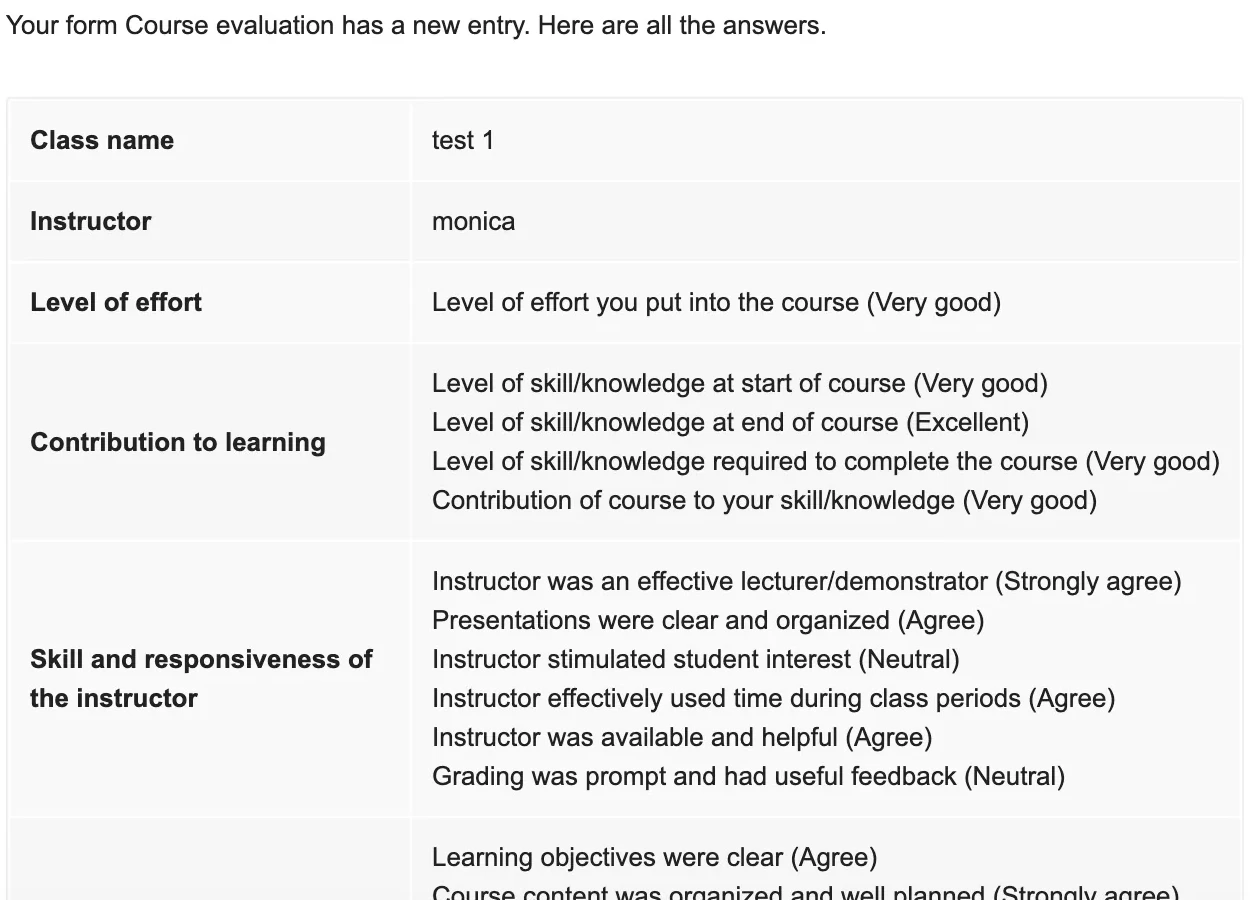
Click where the value should appear, open Markers, and choose the question from your form. For example, add the Name field after “Hello,” or add Comments under “Your request.” The All Answers marker inserts a summary of the submission instead of making you add each answer separately.
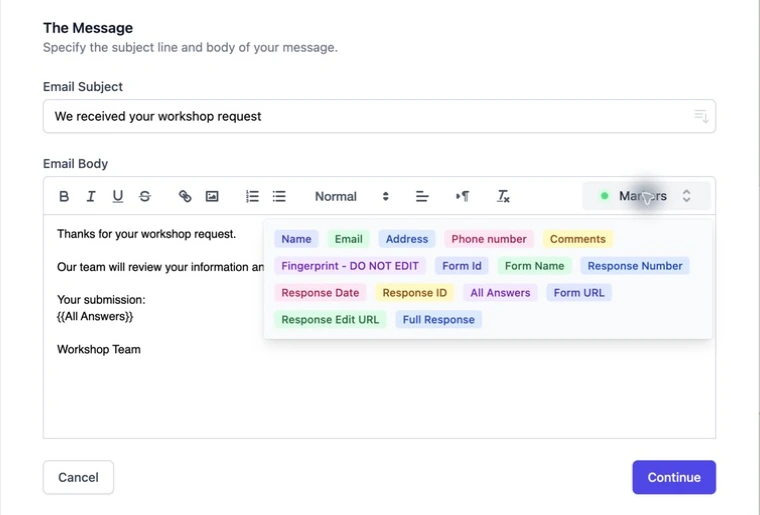
The toolbar also provides bold text, links and lists. A useful layout is one short paragraph, one clearly labeled answer or summary, and one next step. Avoid turning a simple receipt into a long promotional email.
4. Choose the audience
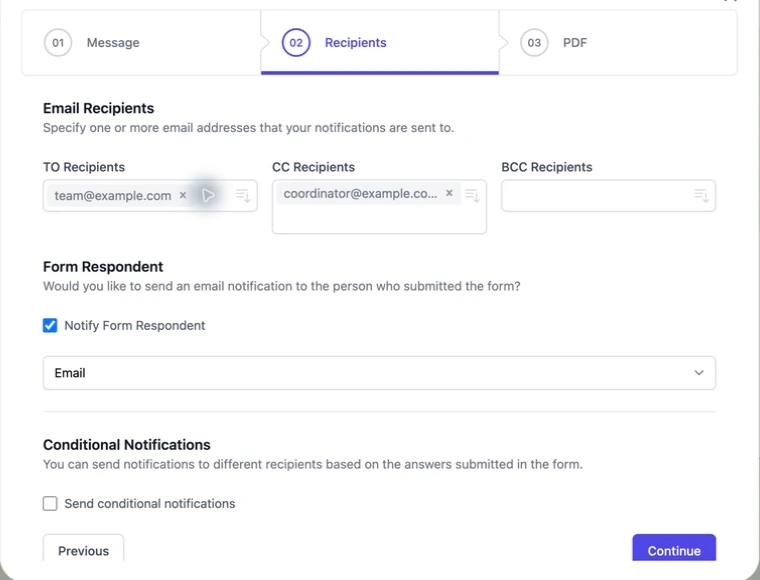
Click Continue to open the recipient settings. For an acknowledgement, enable Notify Form Respondent and choose your form’s Email question. For an internal alert, enter the team’s address in To. Use CC or BCC only when another person needs the same message.
5. Save, submit one example, and inspect the result
Finish saving the workflow, open the respondent link, and submit fictional answers using an inbox you control. Read the received email: the subject should match your template, answer markers should contain the submitted values, and the next step should be clear without opening Forms.
In our earlier controlled test, a recipient confirmed receiving a pipiform notification containing the submitted name and workshop comment. The draft shown above is a new, cleaner template; its screenshot shows the editor rather than a delivered message.
If replies should go to a particular team, configure and test Reply-to separately from the sender display name. The Reply-to setup guide covers a fixed inbox and a form-field address.
When is Google’s built-in email enough?
A basic new-response alert is useful when the form owner only needs to know that something arrived. A response receipt is useful when the respondent only needs a copy of their answers. Choose pipiform when your message needs its own subject, next-step instructions, selected answer fields or recipient workflow.
Questions about custom messages
Can I put an answer in the subject?
Use the subject field’s variable control to insert a field from your form. Keep enough fixed wording that the subject still makes sense when an optional answer is empty.
Why does the email include an answer table?
Look for the All Answers marker in the saved body. Remove it and insert individual fields if you want a shorter message.
Will changing the sender name change my email address?
No. The display name, sending address and Reply-to destination serve different purposes. Check the actual address controls and send a test before promising recipients where their replies will go.
Try it with your own form
Start with one clear acknowledgement. Once it reads well in your inbox, reuse the structure for enquiries, registrations or feedback.
Install Form Notifications · Review the product and pricing
Form Notifications has a limited free mode of 20 emails per day. Check the current plan for recipient limits and paid options before using a large mailing workflow.
For managing forms and reviewing responses on iPhone or iPad, use the separate Forms for Google Drive app. It complements the desktop add-on workflow; an app subscription does not unlock the add-on. The app is US$59.99/year with a 3-day trial, subject to the offer in your App Store region. View the app on the App Store.