
How to Collect Payments with Google Forms (2026)
Can Google Forms Collect Payments?
No — Google Forms cannot collect payments by itself, because it was never built to process transactions. There is no payment question type, no native Stripe/PayPal/Square integration, no checkout step, and no calculation field to multiply quantity by price. Every “Google Forms payment” method is really a way of attaching payment beside the form, not inside it.
That framing matters, because it explains why all three approaches below feel a little bolted-on: you’re using Google Forms for what it’s good at — collecting names, choices, and quantities for with free core features and audience access you control — and handing the actual money to something built to handle money. This works well for small, occasional collection. It works less well the moment you need real order math or a seamless branded checkout. Let’s start with the one rule you can’t bend, then the three methods in order of effort.
⚠️ Never Put Card Numbers in a Google Form
The key rule for this workflow: never collect card numbers or security codes in a Google Forms text question. Those details can spread into response views, linked spreadsheets, exports, or notifications. A general-purpose question is not a processor-hosted payment field. Google’s compliance scope varies by service and setup; do not equate general storage protections with a complete card-processing solution. See Google’s PCI DSS scope and responsibilities.
The safe pattern, used by every legitimate method below, is simple: Google Forms collects only the order information you need (for example, contact details, item, and quantity), and a processor-hosted checkout page — Stripe, PayPal, or Square — takes the card details on its own secure, compliant infrastructure. Configure the flow so neither your form nor your spreadsheet receives card numbers or security codes. Contact details still need appropriate access controls.
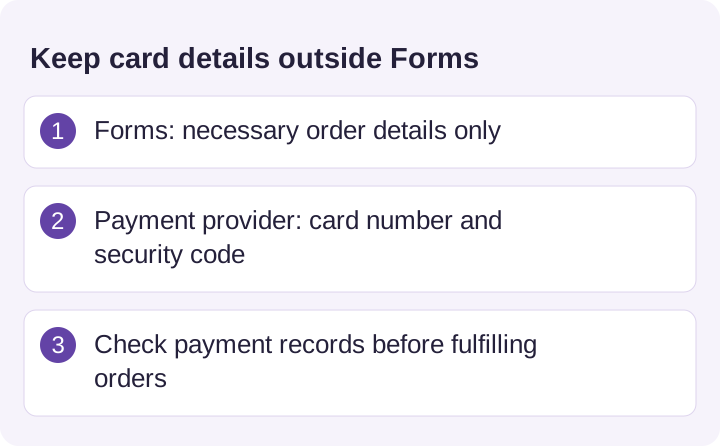
Illustration note: the image is a warning against using ordinary questions for card entry, not a statement about the certification scope of every Google service. Use the current provider documentation when assessing a specific workflow.
Method 1 — Link to a Payment Page After Submit (Free)
The simplest free method is to send people to a payment page after they submit, by pasting a checkout link into the form’s confirmation message. You create a shareable checkout URL in your processor — Stripe Payment Links and PayPal both generate one with no code — and then point your form at it.
- In Stripe (or PayPal), create a payment link for the amount you’re collecting.
- In your Google Form, open Settings.
- Go to the Presentation section.
- Paste your payment link into the confirmation message shown after submitting (something like “Thanks! Complete your payment here: …”).
- Save, and test the flow once yourself end to end.
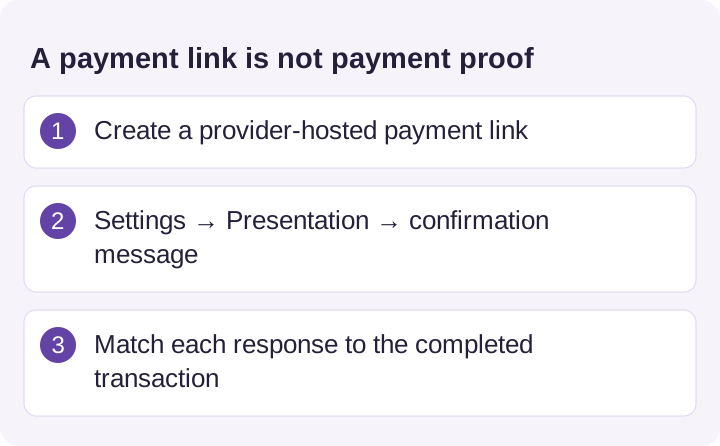
This is free beyond the processor’s own transaction fee, and it suits low-frequency, fixed-amount, trusted-audience situations — a club fee, a small fundraiser, a friend-group order. The honest costs: the form submits whether or not the person pays, so a submission is not proof of payment; you can’t verify who actually paid without cross-checking your Stripe/PayPal dashboard; reconciliation is manual; and Forms does not calculate the checkout amount. A link can be configured for a fixed price or other options supported by the provider, but form answers do not automatically update that checkout. If you’re still building the form itself, our how to create a Google Form on iPhone guide covers that part first.
Method 2 — A Payment QR Code in the Form (In-Person)
For in-person situations, a payment QR code inside the form is often the fastest path. Add an image of a payment code from a service appropriate for your transaction, such as PayPal or a regional wallet, to the form body or printed signage. A phone camera cannot scan its own screen: display the code on another device or paper, or use the wallet’s supported image-import feature. Provide a normal payment link as well. The native confirmation message is text, not an image container. It shines at a table, a stall, or an event where everyone’s already in the room and using the same wallet.
The trade-offs are the same as Method 1, only looser: the form still can’t tell who paid, there’s no automatic reconciliation, and the amount depends on how the payment code or checkout is configured. Treat it as a convenience for face-to-face collection, not a system of record. If you want to generate and place a scannable code on a form from your phone, our Google Forms QR code on iPhone guide covers making the code itself.
Method 3 — A Third-Party Payment Add-On
A Workspace add-on is the closest Google Forms gets to real integrated payment, because it connects an actual processor and ties payment to the response. Tools like Payable Forms and PayQ are examples to investigate. Supported processors and behavior differ by add-on. A suitable integration can read price-related fields and write payment status back to your Google Sheet next to a response; verify the exact mapping, permissions, and payment states in a test.
- Install a payment add-on (for example, Payable Forms) from the Google Workspace Marketplace.
- Open the add-on’s Configure panel and connect a supported payment-provider account.
- Map the form fields that set the amount (so it can total a variable order).
- Publish and test the provided payment flow; the checkout location and handoff depend on the add-on.
- Verify payment status reaches the correct response in your linked Google Sheet, including a failed or abandoned payment.
Setup is generally done in a desktop browser, even though the finished form works fine on a phone. The honest costs: checkout may use the add-on’s or processor’s domain, so confirm the destination and branding; the add-on has its own fees on top of the processor’s, with a model that varies by tool — Payable currently uses transaction-based charges, not a required monthly subscription; and you take on a dependency — authorization, service outages, or billing problems can interrupt the payment flow. In exchange you get closer integration for: variable pricing (real order totals) and payment verification written back to Sheets.
The Real Costs (Fees Stack Up)
Before you pick a method, price it out — because payment fees stack, and the total is easy to underestimate. There are up to two layers: the processor’s per-transaction fee, and (for Method 3) the add-on’s own charge.
| Cost layer | Typical rate (check current pricing) |
|---|---|
| Stripe (processor) | Varies by country, method, and account; check Stripe pricing |
| PayPal (processor) | Varies by product, country, and currency; check PayPal pricing |
| Payment add-on | Tool-specific: transaction fees, subscriptions, or other models |
| Google Forms itself | Free |
A basic payment link or static QR may avoid an extra integration fee, while an add-on can add a second layer. Check for charges from any QR or link service too. Rates change, so confirm the current numbers with each provider before you set your prices — and account for payment costs when planning prices. See Payable’s pricing, Stripe pricing, and PayPal merchant fees.
Comparison — Three Ways to Take Money
Side by side, the three methods trade simplicity for capability in a clear line: the easier it is to set up, the less it verifies and totals for you.
| Factor | Link-out (Method 1) | QR code (Method 2) | Add-on (Method 3) |
|---|---|---|---|
| Cost | Processor; check link service | Processor; check QR service | Processor + add-on model |
| Verifies payment in Forms? | Manual matching | Manual matching | Supported status sync; test it |
| Variable pricing | Provider options; no Forms calculation | Depends on payment destination | Supported field-based totals |
| Checkout location | Processor page | Wallet or processor | Add-on or processor |
| Set up where | Phone or desktop | Phone or desktop | Mostly desktop |
| Best for | Occasional fixed fee | In-person events | Regular, variable orders |
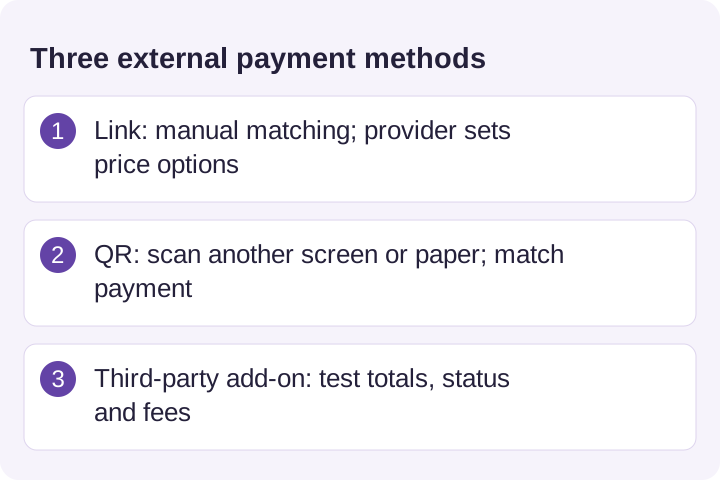
The comparison image is illustrative; provider pricing options, fees, and checkout domains vary as described in the table above. Notice there’s no column where Google Forms handles the money itself — every method hands payment to something else. That’s the honest shape of “payments with Google Forms”: collection in the form, checkout outside it.
When You Should Use a Different Tool
If collecting money is a regular, core part of what you do, a purpose-built tool is genuinely the better choice — and we’ll say that even though it points away from Google Forms. The workarounds here are glue; they shine for occasional, fixed-amount collection where Google Forms’ free reach and familiarity win. They strain when you need variable pricing, branded checkout on your own domain, automatic receipts, or inventory — anything that makes payment a routine, order-shaped operation.
The honest dividing line: use Google Forms + a workaround for the light cases — an event fee, a one-off order run, a donation drive. Reach for a dedicated form-and-payment platform with native checkout once payment becomes something you do every week. Matching the tool to the frequency saves you the reconciliation headache and the stacked fees.
Managing Payment Forms from Your iPhone
To be clear about what our own app does and doesn’t do: Forms for Google Drive (by pipiform) does not process payments. It’s an iOS app for building and managing Google Forms — it doesn’t add a checkout, take cards, or replace any of the three methods above. Payment isn’t our battlefield, and we won’t pretend it is.
What it can do is help you run the forms around a payment flow from an iPhone: create and edit the registration or order form itself (our how to create a Google Form on iPhone guide covers the basics), review responses on the go, and export them for reconciliation — pairing naturally with our convert Google Forms responses to PDF guide when you need a clean record to match against your Stripe or PayPal dashboard. The payment itself still lives with your processor or add-on; the app just makes the form side of it pleasant on a phone.
Manage the request without claiming payment confirmation
On iPhone and iPad. Forms for Google Drive helps you manage registration or order forms from iPhone/iPad. It does not process card payments or verify that money has arrived. Keep the payment provider’s transaction record as the payment evidence.
With the Workspace add-on. Form Notifications by pipiform can send a request acknowledgement and instructions for the next step. Do not label a submission-triggered email “payment received” unless a separately verified payment workflow establishes that status.
View Form Notifications and its features · Install the add-on · Get Forms for Google Drive on the App Store
The app and Workspace add-ons are separate pipiform products. Forms for Google Drive is US$59.99/year with a 3-day trial; check the App Store offer for your region. Form Notifications’ limited free mode allows 20 emails/day; paid features and recipient options depend on the plan. See current product pricing before subscribing.
Summary
Google Forms can’t collect payments natively — no payment field, no processor integration, no order-totaling, and a firm rule that card numbers must never go in a form because a text question is not a payment field. Three workarounds cover the real cases: link out to a Stripe or PayPal checkout in the confirmation message (no automatic Forms verification; amount options depend on the checkout), a QR code for in-person events (fast and loose), or a Workspace add-on like Payable Forms that connects a real processor, totals variable orders, and writes payment status back to Sheets (the closest to real, at the cost of off-domain checkout and its own fees). Price in the stacked fees, keep all card data on the processor’s side, and if taking money becomes routine, a purpose-built tool is the honest upgrade. Google Forms is a fine, free way to collect the form; just let something built for money be the cashier.
Frequently Asked Questions
Can Google Forms collect payments?
Not on its own. Google Forms has no payment field, no built-in Stripe or PayPal integration, no checkout flow, and no calculation field to total an order — it was never designed to handle transactions. What people do instead is bolt payment onto the form from the outside: link out to a Stripe or PayPal checkout after submission, drop a payment QR code into the form, or install a Workspace add-on that connects a real payment processor and writes the payment status back to Google Sheets. Each works, but each is a workaround glued beside the form rather than a feature built into it, and each has trade-offs worth understanding first.
Can I add a credit card field to a Google Form?
Do not use a normal Google Forms text question to collect card numbers or security codes. The form is not a processor-hosted card-entry flow, and the data could spread into response views, Sheets, exports, and notification emails. Use a payment provider’s checkout for card details and collect only the necessary order information in Forms. Compliance depends on the exact service, configuration, and your responsibilities; a generic form field is not a substitute.
How do I add a Stripe or PayPal link to a Google Form?
Create a payment link in your processor first — Stripe Payment Links and PayPal both let you generate a shareable checkout URL with no code. Then, in your form, open Settings, go to the Presentation section, and paste the link into the confirmation message respondents see after submitting (you can also put it in the form description). When someone finishes the form, they see 'Thanks — complete your payment here' with your link. It's the simplest, free method, and it works from an iPhone; just know the form still records a submission whether or not the person actually pays.
Can I verify who actually paid?
Yes, but a plain link does not verify payment automatically in Google Forms. Match responses against completed transactions in your processor dashboard, ideally with an order reference. A suitable add-on or custom integration can write status back to Sheets; verify that the status refers to the right response and reflects failed, pending, refunded, or disputed payments appropriately.
Can Google Forms calculate an order total?
Not natively. Google Forms has no calculation or formula field, so it cannot multiply a quantity by a unit price or sum a cart to show an order total — a real limitation for anything order-shaped. You can work around it with fixed-price choices (for example, separate options priced $10, $20, $30) so respondents pick the amount directly, but the form itself never does math. If you need true variable pricing — quantity times price, tiered options, add-ons that sum — a payment add-on can read the selected fields and calculate the amount at checkout, which is one of the main reasons people graduate from the link-out method to an add-on.
What does a payment add-on cost?
Budget for the payment provider’s processing fees and any add-on fees. Rates vary by country, payment method, currency, and contract. Payable currently uses transaction-based platform charges rather than a required monthly subscription; other add-ons may charge differently. Check both providers’ pricing and any conversion, refund, or dispute charges before choosing. A free form does not make payment processing free.
Is it safe to take payments through Google Forms?
Use a legitimate payment provider’s hosted checkout and keep card numbers and security codes out of the form, response sheet, and emails. Confirm the destination, provider settings, account permissions, and payment status before fulfilling orders. This reduces exposure; it does not make every linked service or configuration automatically safe or compliant.
Should I use a different tool for payments?
If payments are a regular part of your work, honestly, yes — even though that's not the answer that benefits us. Google Forms plus a workaround is a good fit for occasional, fixed-amount collection: an event fee, a small order run, a donation drive. But if you're taking payments routinely and need variable pricing, branded checkout on your own domain, automatic receipts, or inventory, a dedicated form-and-payment platform with native checkout will save you the reconciliation and the glue. Use Google Forms for the light, infrequent cases where its free reach and familiarity win; reach for a purpose-built tool when collecting money becomes a core, repeated task.